

Hollow Knight Resin Keycaps: Build a Tiny Hallownest Setup
Hollow Knight has a visual identity that stays with you: quiet ruins, pale masks, dark caverns, and small characters moving through enormous spaces. Translating that atmosphere into a desk setup can be difficult. A large poster or bright RGB preset can reference the game, but neither necessarily captures its sense of scale. A miniature resin scene does something more fitting. It places a tiny version of Hallownest directly beneath your fingertip.
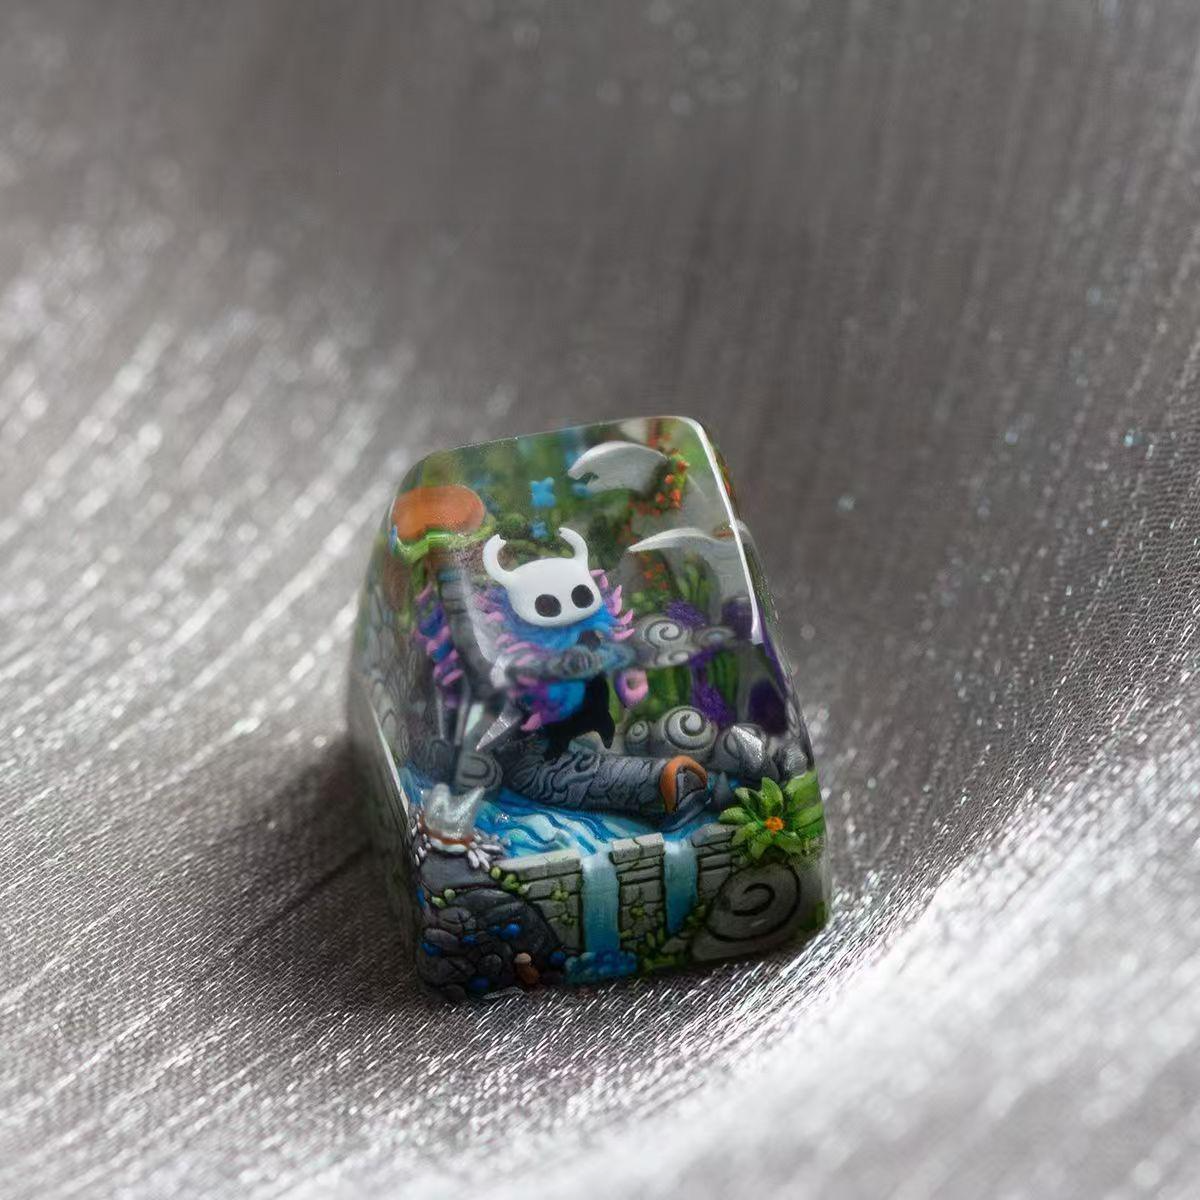
That is the appeal of a Hollow Knight resin artisan keycap. It is not intended to replace an entire keycap set or turn every part of a keyboard into merchandise. It works as a single focal point: a small, layered world that rewards a closer look. For mechanical keyboard enthusiasts, it adds texture and depth. For Hollow Knight fans, it feels like a collectible that happens to live on a useful object.
Why a Miniature Scene Fits Hollow Knight So Well
The world of Hollow Knight is built around depth. Foreground platforms, distant architecture, drifting particles, and silhouettes create the feeling that every room extends beyond the screen. A flat printed keycap can reproduce a symbol or character, but it cannot fully recreate that sense of space.
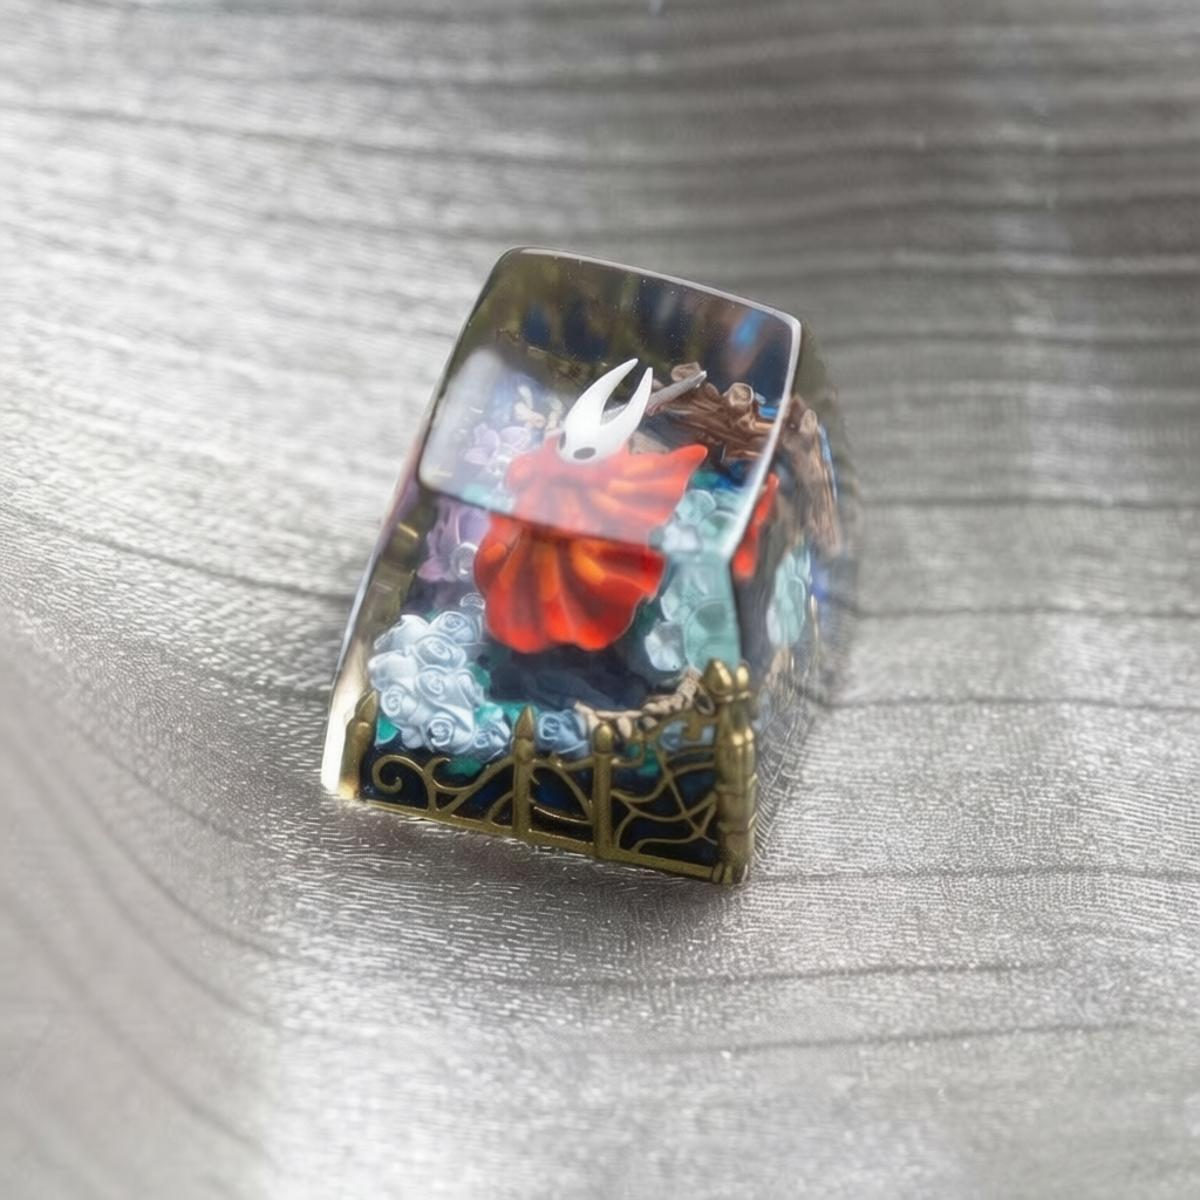
The Hollow Knight Miniature Scene Resin Artisan Keycaps use layered epoxy resin to create a scene with visible separation between elements. The product is offered in two scene designs associated with the Knight and Hornet. Each cap is hand-cast and hand-polished, approximately SA height, sized for one standard key position, and designed for cross-shaped MX-style switch stems.
The layered construction is what makes the cap change as you move around it. Viewed straight on, it reads as a compact illustration. From an angle, the foreground, character, and background begin to separate. Light catches the polished resin surface while the darker parts of the scene retain the moody tone associated with Hallownest.
Hand finishing also matters. A mass-printed keycap aims for exact repetition. A hand-cast resin piece carries small variations from placement, casting, curing, and polishing. Those differences should not overwhelm the design, but they give the object the character of a miniature collectible rather than a factory legend printed across thousands of identical sets.
Resin Artisan Keycap or Printed Keycap?
Both have a place on a good keyboard. A printed PBT set is practical for the main typing area. It offers a consistent profile, durable legends, and a familiar surface across dozens of keys. If you type for hours every day, that uniformity is valuable.
A resin artisan is more sculptural. It is usually taller, visually denser, and more expensive per key. Its value comes from the three-dimensional composition and the hand-finished surface, not from covering a full layout. That makes it better suited to Escape, a function key, or a macro key than to letters used continuously.
| Consideration | Printed PBT Keycap | Layered Resin Artisan |
|---|---|---|
| Best role | Everyday keyboard foundation | Collectible focal accent |
| Visual effect | Flat printed artwork or legend | Miniature scene with depth |
| Consistency | Uniform across a full set | Natural hand-finished variation |
| Typical placement | Main typing area | Escape, function, or macro key |
| Care | Routine keycap cleaning | Gentle cleaning and careful removal |
The most balanced approach is to combine them. Use a dark, neutral, or lightly themed PBT set for the board, then let one resin scene carry the Hollow Knight reference.
Choosing Between the Knight and Hornet
The right design depends less on popularity and more on the mood of the setup. A Knight-centered scene can feel quiet and exploratory, especially on boards built around black, gray, ivory, or muted blue. It works well when the rest of the desk is minimal and the artisan is meant to be discovered rather than announced.
A Hornet scene can introduce sharper contrast and a more energetic focal point. Red accents can be echoed in a cable, desk mat, switch plate, or a small area of backlighting without making the whole setup bright. The key is repetition in small doses. One accent repeated two or three times looks intentional; the same color on every accessory can make the display feel crowded.
If the keycap is a gift, look at the recipient's existing choices. Their favorite character, avatar, figure collection, or wallpaper can offer a stronger clue than asking which design is objectively best. A personal selection turns a small accessory into evidence that you noticed what they like.
Where to Place an Artisan Keycap
Escape remains the easiest recommendation. It is highly visible, separated from the main letter cluster, and pressed less frequently than common typing keys. An approximately SA-height artisan will stand above many Cherry-, OEM-, or XDA-profile sets, but that height difference often looks deliberate in the corner of the board.
Function keys are another good option on a full-size or tenkeyless keyboard. Custom layouts with dedicated macro keys offer even more freedom. A Hollow Knight artisan could sit on a key assigned to launch a game library, mute audio, or open a favorite playlist, giving the decorative choice a practical purpose.
Before installing it, confirm the switch stem. These caps are designed for cross-shaped MX-style stems. Low-profile switches, proprietary stems, and membrane keyboards may not fit. The Keycap Compatibility Guide is a useful check when the keyboard model is unfamiliar.
Use a keycap puller during installation and removal. Press the cap straight down without forcing it. If the fit feels wrong, stop rather than twisting the stem or applying extra pressure.
Lighting a Layered Resin Scene
More light is not always better. Strong rainbow effects can compete with the miniature artwork and flatten the mood. Start with the keyboard lighting turned low or off, then add a single static color. Cool white, soft blue, or a restrained red accent can reveal the resin layers without overwhelming them.
Ambient desk lighting often produces a better result than LEDs directly beneath the key. A lamp placed to one side creates highlights on the polished surface and shadows between visual layers. As the viewing angle changes, the scene gains depth without needing an elaborate lighting setup.
For photographs, avoid pointing a bright light directly at the resin. Diffused side lighting reduces glare and makes the character and background easier to see. A slight three-quarter angle usually communicates the layered structure more clearly than a straight overhead shot.
A Gift for Two Kinds of Collector
Mechanical keyboard fans often care about details that are difficult for a gift buyer to guess: switch weight, spring type, stabilizer tuning, layout, sound, and keycap profile. Buying a complete keyboard component can therefore be risky. A single compatible artisan is a more focused decision.
Hollow Knight collectors, meanwhile, appreciate objects that preserve the game's atmosphere rather than simply placing a logo on a surface. A miniature resin scene bridges the two interests. It is small enough for a desk with limited space, specific enough to feel personal, and functional enough not to become another item that needs a separate shelf.
Compatibility still comes first. Confirm an MX-style cross stem and a standard single-key position. After that, character choice and visual mood matter more than technical specifications.
Caring for a Hand-Polished Resin Keycap
Resin deserves gentler care than a standard typing key. Remove dust with a clean microfiber cloth. For fingerprints, use a slightly damp soft cloth, then dry the surface. Avoid abrasive pads, alcohol-based cleaners, solvents, and very hot water. These can cloud or scratch a polished finish.
Keep the artisan away from prolonged direct sunlight and excessive heat when it is displayed off the keyboard. Store it separately from metal tools or loose keycaps that could rub against its surface. The Product Care Guide provides broader maintenance advice for collectible desk pieces.
Let One Key Carry the Story
A strong themed setup does not need to explain itself from every angle. One carefully chosen object can do more than a desk full of matching logos. A Hollow Knight resin artisan keycap gives a keyboard that quiet point of focus: a tiny environment, a recognizable character, and a hand-finished surface that changes as the light moves.
Keep the rest of the board practical. Let PBT handle the daily typing, place the artisan where it can be seen without getting in the way, and choose lighting that supports the scene. The result feels less like themed merchandise and more like a personal desk built around a world you want to revisit.
FAQ
Do Hollow Knight resin artisan keycaps fit every keyboard?
No. They are designed for cross-shaped MX-style switch stems and one standard single-key position. Check low-profile, proprietary, and membrane keyboards carefully before ordering.
How tall are the keycaps?
The product is approximately SA height, so it may sit above Cherry-, OEM-, or XDA-profile keycaps. That height difference is usually easiest to accommodate on Escape or a function key.
Are the keycaps handmade?
The product is described as hand-cast and hand-polished. Minor variations can occur as part of the handmade process.
Which key should I replace?
Escape is the most common choice. Function and macro keys also work well because they remain visible without interrupting the main typing area.
What comes in the box?
One selected resin scene keycap is included. The keyboard shown in product photography is not included.
How should I clean the resin surface?
Use a soft dry or slightly damp cloth. Avoid abrasives, harsh chemicals, solvents, high heat, and prolonged direct sunlight.